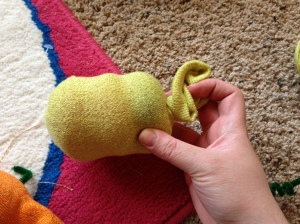
Archives

Photo Editing- Beginner’s Pixlr Basics

Hi Everyone!

A couple months ago I created a video to help people out on how to use Pixlr. Pixlr is an online photo editor comparable to Photoshop. I don’t know how to use Photoshop and I’ve tried a couple of other online/free editors and I feel like Pixlr is the best and easiest one to use. I don’t use it to create things or graphic design. I mainly use it to alter photos like lighting (too much or too little), saturation, focus, etc. So if you have simple tasks you need to fix your photo it’s easy to achieve using this site. I am by no means an expert but I’ve played quite a bit with it and the tutorials I’ve found were either very lengthy or just not what I was looking for (most were specific to Photoshop which was pretty different). I also left links in the description of the video of sites I came across that helped with how to balance a photograph, and other tips and tricks you might find useful as well. I hope this helps someone else out there! Please let me know if it does 😀

Video:

https://www.youtube.com/watch?v=eH0VVWHKCIs

Pixlr Site:

https://pixlr.com

Edit: I would insert some of my before and afters but for whatever reason they don’t want to upload on here! check the end of the video for it if you want to see a few 😀

~~ Andrea

DIY Yarn Bottle

I love this!

ArtsyJess

DIY Yarn Bottle

DIY Christmas yarn bottle

Materials

empty wine bottle (already had)

red and white yarn (2.99 each at michaels)

fake flowers (I got mine at the dollar tree. 1 bundle of poinsettia and 1 bundle of gold glitter leaves $1 each)

glue gun

mod podge

brush

1) Start at the top, hot glue the end of the red yarn to the bottle. After that use the mod podge to attach the string to the bottle. With a brush, spread the mod podge on the bottle a little at a time and wrap the yarn. Continue doing this until you get to the bottom.

2) When you are finished cut the yarn and hot glue it to the bottom, try to hide it between the other yarn.

3) With  both the white and red yarn, hold them together as if they were 1 string and make your design as you wish starting at…

View original post 124 more words

DIY Pumpkin Topiary

love love love these! keep more fall/halloween inspired diys coming! 😀

ArtsyJess

DIY Pumpkin Topiary dollar tree dollar store cheap inexpensive fall decor crow orange leaves leaf thanksgiving Halloween autumn

DIY pumpkin topiary for $20

DIY Pumpkin Topiary dollar tree dollar store cheap inexpensive fall decor crow orange leaves leaf thanksgiving Halloween autumn

Materials

7 pumpkins

1 crow

8 bunches of leaves (assorted)

1 orange bucket

1 square styrofoam

1 flat circle styrofoam

1 pack of floral moss

1 long dowel rod

glue gun

items DIY Pumpkin Topiary dollar tree dollar store cheap inexpensive fall decor crow orange leaves leaf thanksgiving Halloween autumn pumpkin stack

1) Glue the square styrofoam in the bucket then the circle styrofoam on top

styrofoam DIY Pumpkin Topiary dollar tree dollar store cheap inexpensive fall decor crow orange leaves leaf thanksgiving Halloween autumn pumpkin stack

2) Arrange 7 of the leave bunches

leaves DIY Pumpkin Topiary dollar tree dollar store cheap inexpensive fall decor crow orange leaves leaf thanksgiving Halloween autumn pumpkin stack

bucket leaves DIY Pumpkin Topiary dollar tree dollar store cheap inexpensive fall decor crow orange leaves leaf thanksgiving Halloween autumn pumpkin stack

3) Cover the styrofoam with floral moss

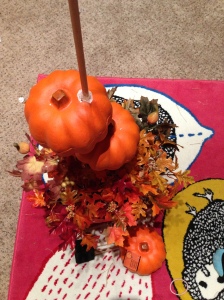
4) Stick the wooden dowel rod into the center of the square styrofoam. Stick the top of the rod through the pumpkins. At first I was pushing them through, then my wonderful husband was like why don’t you drill a whole in them.

pumpkin DIY Pumpkin Topiary dollar tree dollar store cheap inexpensive fall decor crow orange leaves leaf thanksgiving Halloween autumn pumpkin stack

pum DIY Pumpkin Topiary dollar tree dollar store cheap inexpensive fall decor crow orange leaves leaf thanksgiving Halloween autumn pumpkin stack

DIY Pumpkin Topiary dollar tree dollar store cheap inexpensive fall decor crow orange leaves leaf thanksgiving Halloween autumn pumpkin stack

5) Once you finish putting the pumpkins on the dowel, pull the leaves off one of the bunches and glue them in-between the pumpkins.

steam DIY Pumpkin Topiary dollar tree dollar store cheap inexpensive fall decor crow orange leaves leaf thanksgiving Halloween autumn pumpkin stack

6) Then top it off with the crow

crow DIY Pumpkin Topiary dollar tree dollar store cheap inexpensive fall decor crow orange leaves leaf thanksgiving Halloween autumn pumpkin stack

View original post

DIY Burlap Wreath

Love this for the fall/halloween! So cheap and easy!! ❤

ArtsyJess

DIY Burlap Wreath DIY Pumpkin dollar tree dollar store cheap inexpensive fall decor red orange leaves leaf thanksgiving Halloween autumn pumpkin ribbon burlap wreath socks brillo pads

DIY Burlap wreath with dollar tree decorations

diy wreath DIY Burlap Wreath DIY Pumpkin dollar tree dollar store cheap inexpensive fall decor red orange leaves leaf thanksgiving Halloween autumn pumpkin ribbon burlap wreath socks brillo pads

I bought 1 yard of shimmery burlap and cut it into 4 inch wide strips. I paid 10 dollars for the yard of burlap at a fabric store and $1.50 for the floral wreath at Michael’s after a 50% off coupon.

– I followed the step from this blog http://housegirlhaley.wordpress.com/2012/12/10/diy-burlap-wreath/

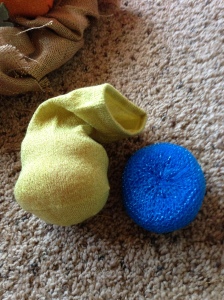
– Once I finished I made pumpkins with the socks and scrubs. The dollar tree had shimmery socks and scrubbers which would go well with the burlap.

Materialsto make pumpkin

Dollar tree socks

Dollar tree sponge

Dollar tree pipe cleaners

Materials to finish other decor

Dollar tree leaves

Dollar tree ribbon

socks DIY Burlap Wreath DIY Pumpkin dollar tree dollar store cheap inexpensive fall decor red orange leaves leaf thanksgiving Halloween autumn pumpkin ribbon burlap wreath socks brillo pads

scrubber DIY Burlap Wreath DIY Pumpkin dollar tree dollar store cheap inexpensive fall decor red orange leaves leaf thanksgiving Halloween autumn pumpkin ribbon burlap wreath socks brillo pads

1) Stuff the sock with three sponges

sock and scrub DIY Burlap Wreath DIY Pumpkin dollar tree dollar store cheap inexpensive fall decor red orange leaves leaf thanksgiving Halloween autumn pumpkin ribbon burlap wreath socks brillo pads

stuffing DIY Burlap Wreath DIY Pumpkin dollar tree dollar store cheap inexpensive fall decor red orange leaves leaf thanksgiving Halloween autumn pumpkin ribbon burlap wreath socks brillo pads

comp stuff DIY Burlap Wreath DIY Pumpkin dollar tree dollar store cheap inexpensive fall decor red orange leaves leaf thanksgiving Halloween autumn pumpkin ribbon burlap wreath socks brillo pads

2) Twist the end of the sock to make a stem shape

twist DIY Burlap Wreath DIY Pumpkin dollar tree dollar store cheap inexpensive fall decor red orange leaves leaf thanksgiving Halloween autumn pumpkin ribbon burlap wreath socks brillo pads

3) Pull out all extra slack and force the pipe cleaner down  to make the pumpkin shape

tiwst DIY Burlap Wreath DIY Pumpkin dollar tree dollar store cheap inexpensive fall decor red orange leaves leaf thanksgiving Halloween autumn pumpkin ribbon burlap wreath socks brillo pads

4) Use pipe cleaner to…

View original post 78 more words

DIY Makeup Brush Holder

Hello everyone!

This post is about making a brush holder out of… a mug! I got the idea watching Pursebuzz‘s video on a cute, pink, over-sized cup with attached saucer made out of iron. It was very big though, so she had to put a smaller cup in the middle with the actual brushes in it. It looks like it’s an outside decor item but it’s very creative to use it that way!

So I came up with an idea that would be perfect to add to the two gifts I was giving to my sister and boyfriend’s sister (who’s birthdays were coming up). I had bought my bf’s sister a bunch of Real Technique brushes (love them!) and my sister brushes/makeup I knew she would like (Milani Liquify Eyeliner, Covergirl Lash Blast original mascara (her fav), Ecotools brushes, ELF brushes, and a few other things I can’t remember).

I decided to head to the Dollar Tree to see if they had a glass or mug that I could decoupage. I have decoupaged other items as gifts and had tons of different colored tissue paper left over. I was looking for something that would be tall enough for long brushes but not too tall to fit the smaller travel sized/eye brushes. It also had to have a large enough rim but again, not TOO large like one of those big round cappuccino cups. This was probably the most challenging part of the whole project.

I finally narrowed my choice down to a shorter ceramic mug or a brandy type glass. In the end I chose the mug because I liked that it had a handle and grooves along the side.
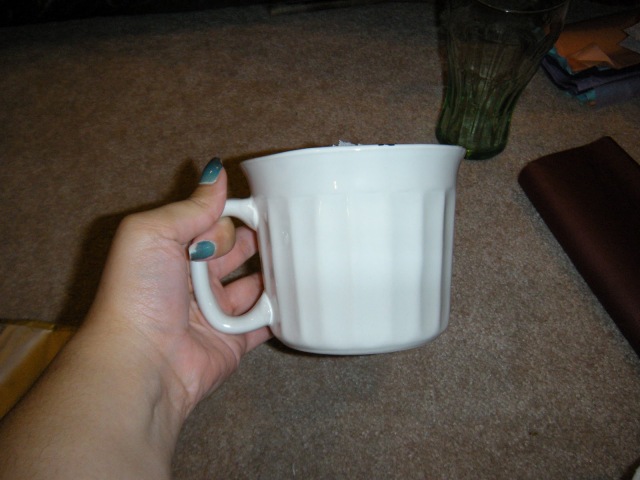
cappuccino mug dollar tree dollar store white ceramic with grooves diy makeup brush glass cup

Dollar Tree mug!

Here are all the supplies I used and where I got them.

mod podge crafts decoupage mug diy brush holder cup glass

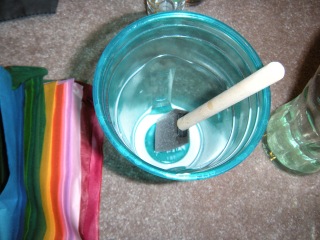
mod podge mixed with water in a cup mod podge crafts decoupage mug diy brush holder cup glass

Mod Podge mixed with some water in a plastic cup

  • mod podge and sponge came in a pack at AC Moore – I used a mixture of the mod podge with water in a plastic cup.
  • A stack of tissue paper which I got from AC Moore for pretty cheap as well a while back.
  • Two ribbons (a yellow and a silver) at AC Moore on sale for 50 cents each!
  • Mug and main tissue paper for the outside I got from the Dollar Tree.
  • I used a sparkly white tissue paper I received in one of my Birchboxes mixed with black on the inside.
  • Glue gun I bought at Walmart for around $10.

I decided the theme I would go for was yellow and gray. I think the combination is very classy/elegant and would match any bathroom/vanity/decor. At first I pictured making the mug gray and with yellow trim, but I found the perfect tissue paper at the dollar store that was the exact style I was going for!

pale yellow pastel shiny white glittery tissue paper ac moore dollar tree decoupage diy makeup brush holder

damask design tissue paper in gray and white diy makeup brush holder decoupage cup and black tissue paper DOLLAR TREE DOLLAR STORE

I started with the inside of the mug. I originally wanted it to be gray inside (after finding this cute paper for the outside) but did not have gray tissue paper and could not find it at the store. So, I tried to put black paper first and then the sparkly white.  It didn’t come out gray but I liked the effect anyway.

One layer of black and one layer of white (still wet):
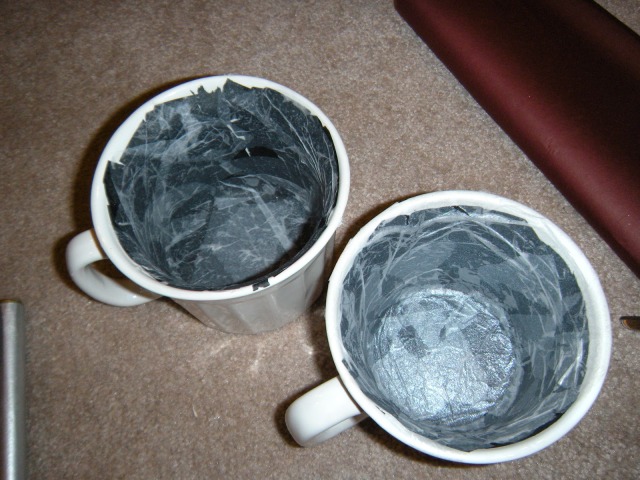
DIY MAKEUP BRUSH HOLDER DECOUPAGE TISSUE PAPER YELLOW AND GREY GRAY DOLLAR STORE DOLLAR TREE

Mugs with black tissue paper and then the shiny/glittery white tissue paper on top

After a few more layers of white, the finished inside:

DIY MAKEUP BRUSH HOLDER DECOUPAGE TISSUE PAPER YELLOW AND GREY GRAY DOLLAR STORE DOLLAR TREE

DIY MAKEUP BRUSH HOLDER DECOUPAGE TISSUE PAPER YELLOW AND GREY GRAY DOLLAR STORE DOLLAR TREE

After letting them dry completely (you can use a hairdryer in between layers), I started on the outside. For the outside I chose a pastel yellow (rather than a bright yellow) to go underneath the patterned tissue paper. I was afraid the bright one would show through too much and I’m glad I did the pastel because it was just the subtle effect I was going for, came out perfect.

One layer of pastel yellow:

DIY MAKEUP BRUSH HOLDER DECOUPAGE TISSUE PAPER YELLOW AND GREY GRAY DOLLAR STORE DOLLAR TREE

DIY MAKEUP BRUSH HOLDER DECOUPAGE TISSUE PAPER YELLOW AND GREY GRAY DOLLAR STORE DOLLAR TREE

DIY MAKEUP BRUSH HOLDER DECOUPAGE TISSUE PAPER YELLOW AND GREY GRAY DOLLAR STORE DOLLAR TREE

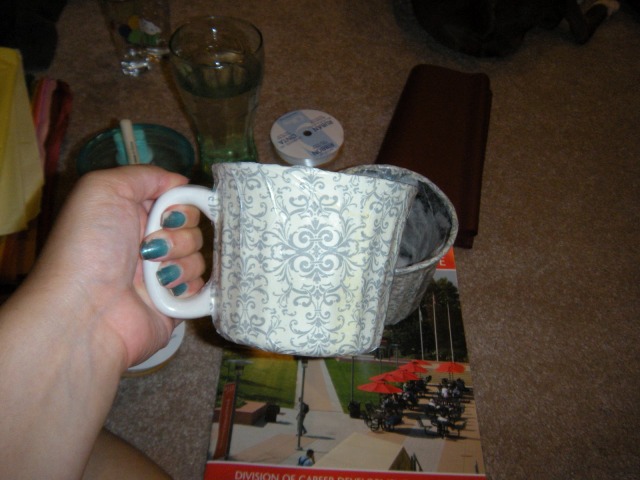
I then added one layer of the patterned tissue. This was really tricky because of the grooves and shape of the mug. The mismatching of the pattern isn’t too noticeable though in the end result.

DIY MAKEUP BRUSH HOLDER DECOUPAGE TISSUE PAPER YELLOW AND GREY GRAY DOLLAR STORE DOLLAR TREE

DIY MAKEUP BRUSH HOLDER DECOUPAGE TISSUE PAPER YELLOW AND GREY GRAY DOLLAR STORE DOLLAR TREE

DIY MAKEUP BRUSH HOLDER DECOUPAGE TISSUE PAPER YELLOW AND GREY GRAY DOLLAR STORE DOLLAR TREE

DIY MAKEUP BRUSH HOLDER DECOUPAGE TISSUE PAPER YELLOW AND GREY GRAY DOLLAR STORE DOLLAR TREE

I made sure to put the yellow and patterned paper all the way to the bottom to make sure you could not see any part of the mug when it’s placed down. Also, I made the yellow and patterned paper overlap the rim of the mug because I was planning to cover it up anyway.

After I let it dry a bit, I made sure to go over the inside and outside with the mod podge a few times to make sure it was sealed and shiny (if left in the bathroom I didn’t want it getting ruined with humidity or water).

I then began with the ribbon. I first hot glued the silver ribbon along the inner rim of the mug to cover up the seam of the inside and outside tissue paper.

DIY MAKEUP BRUSH HOLDER DECOUPAGE TISSUE PAPER YELLOW AND GREY GRAY DOLLAR STORE DOLLAR TREE

I was originally going to leave it at that and then add the yellow ribbon in the middle of the silver, but I decided to add another layer of the silver right below the first one.

DIY MAKEUP BRUSH HOLDER DECOUPAGE TISSUE PAPER YELLOW AND GREY GRAY DOLLAR STORE DOLLAR TREE

I then added the bright yellow ribbon in between the two silver ones.

DIY MAKEUP BRUSH HOLDER DECOUPAGE TISSUE PAPER YELLOW AND GREY GRAY DOLLAR STORE DOLLAR TREE

I picked the bright yellow rather than a pastel because I thought it needed a pop of color! I let it dry for a day or two and this is the finished mug!

DIY MAKEUP BRUSH HOLDER DECOUPAGE TISSUE PAPER YELLOW AND GREY GRAY DOLLAR STORE DOLLAR TREE

DIY MAKEUP BRUSH HOLDER DECOUPAGE TISSUE PAPER YELLOW AND GREY GRAY DOLLAR STORE DOLLAR TREE

I forgot to mention that I left the handles without anything on them. My sister saw me making them before I was done so I asked her advice on it and she told me she would rather it be bare. I figured it was probably for the best because it would be handled a lot (lol see what I did there?) and I don’t know how good it would hold up.

I hope you guys have enjoyed this post! Let me know what else you’d like to see and, if you tried this out I’d love to see pictures. I’m sure you can add rhinestones or glitter, even tulle; anything that suits your style! I have a few more posts to come. 😀

TL;DR — Just follow the pictures!

~~Andrea